Lighting Design Fundamentals for Contractors: Master the Basics
Master core lighting design fundamentals to elevate your contracting business. This guide covers color temperature, spacing rules, roofline techniques, tree wrapping, and achieving perfect design balance for professional, high-end installations.
Mastering lighting design fundamentals is the key for contractors to create stunning, professional holiday and architectural lighting displays that attract high-value clients and set their business apart. By moving beyond simply hanging lights and applying core principles of color, spacing, and balance, you can transform any property into a breathtaking showcase.
What are the Core Principles of Lighting Design?
For a professional lighting contractor, a deep understanding of design principles is what separates amateur work from high-end, bespoke installations. It's not just about the lights themselves, but how they are used to create a cohesive, balanced, and emotionally resonant experience. This expertise allows you to justify premium pricing, build a stronger brand, and create a portfolio of work that sells itself. Let's dive into the foundational elements that will elevate your projects.
Understanding Color Temperature and Psychology
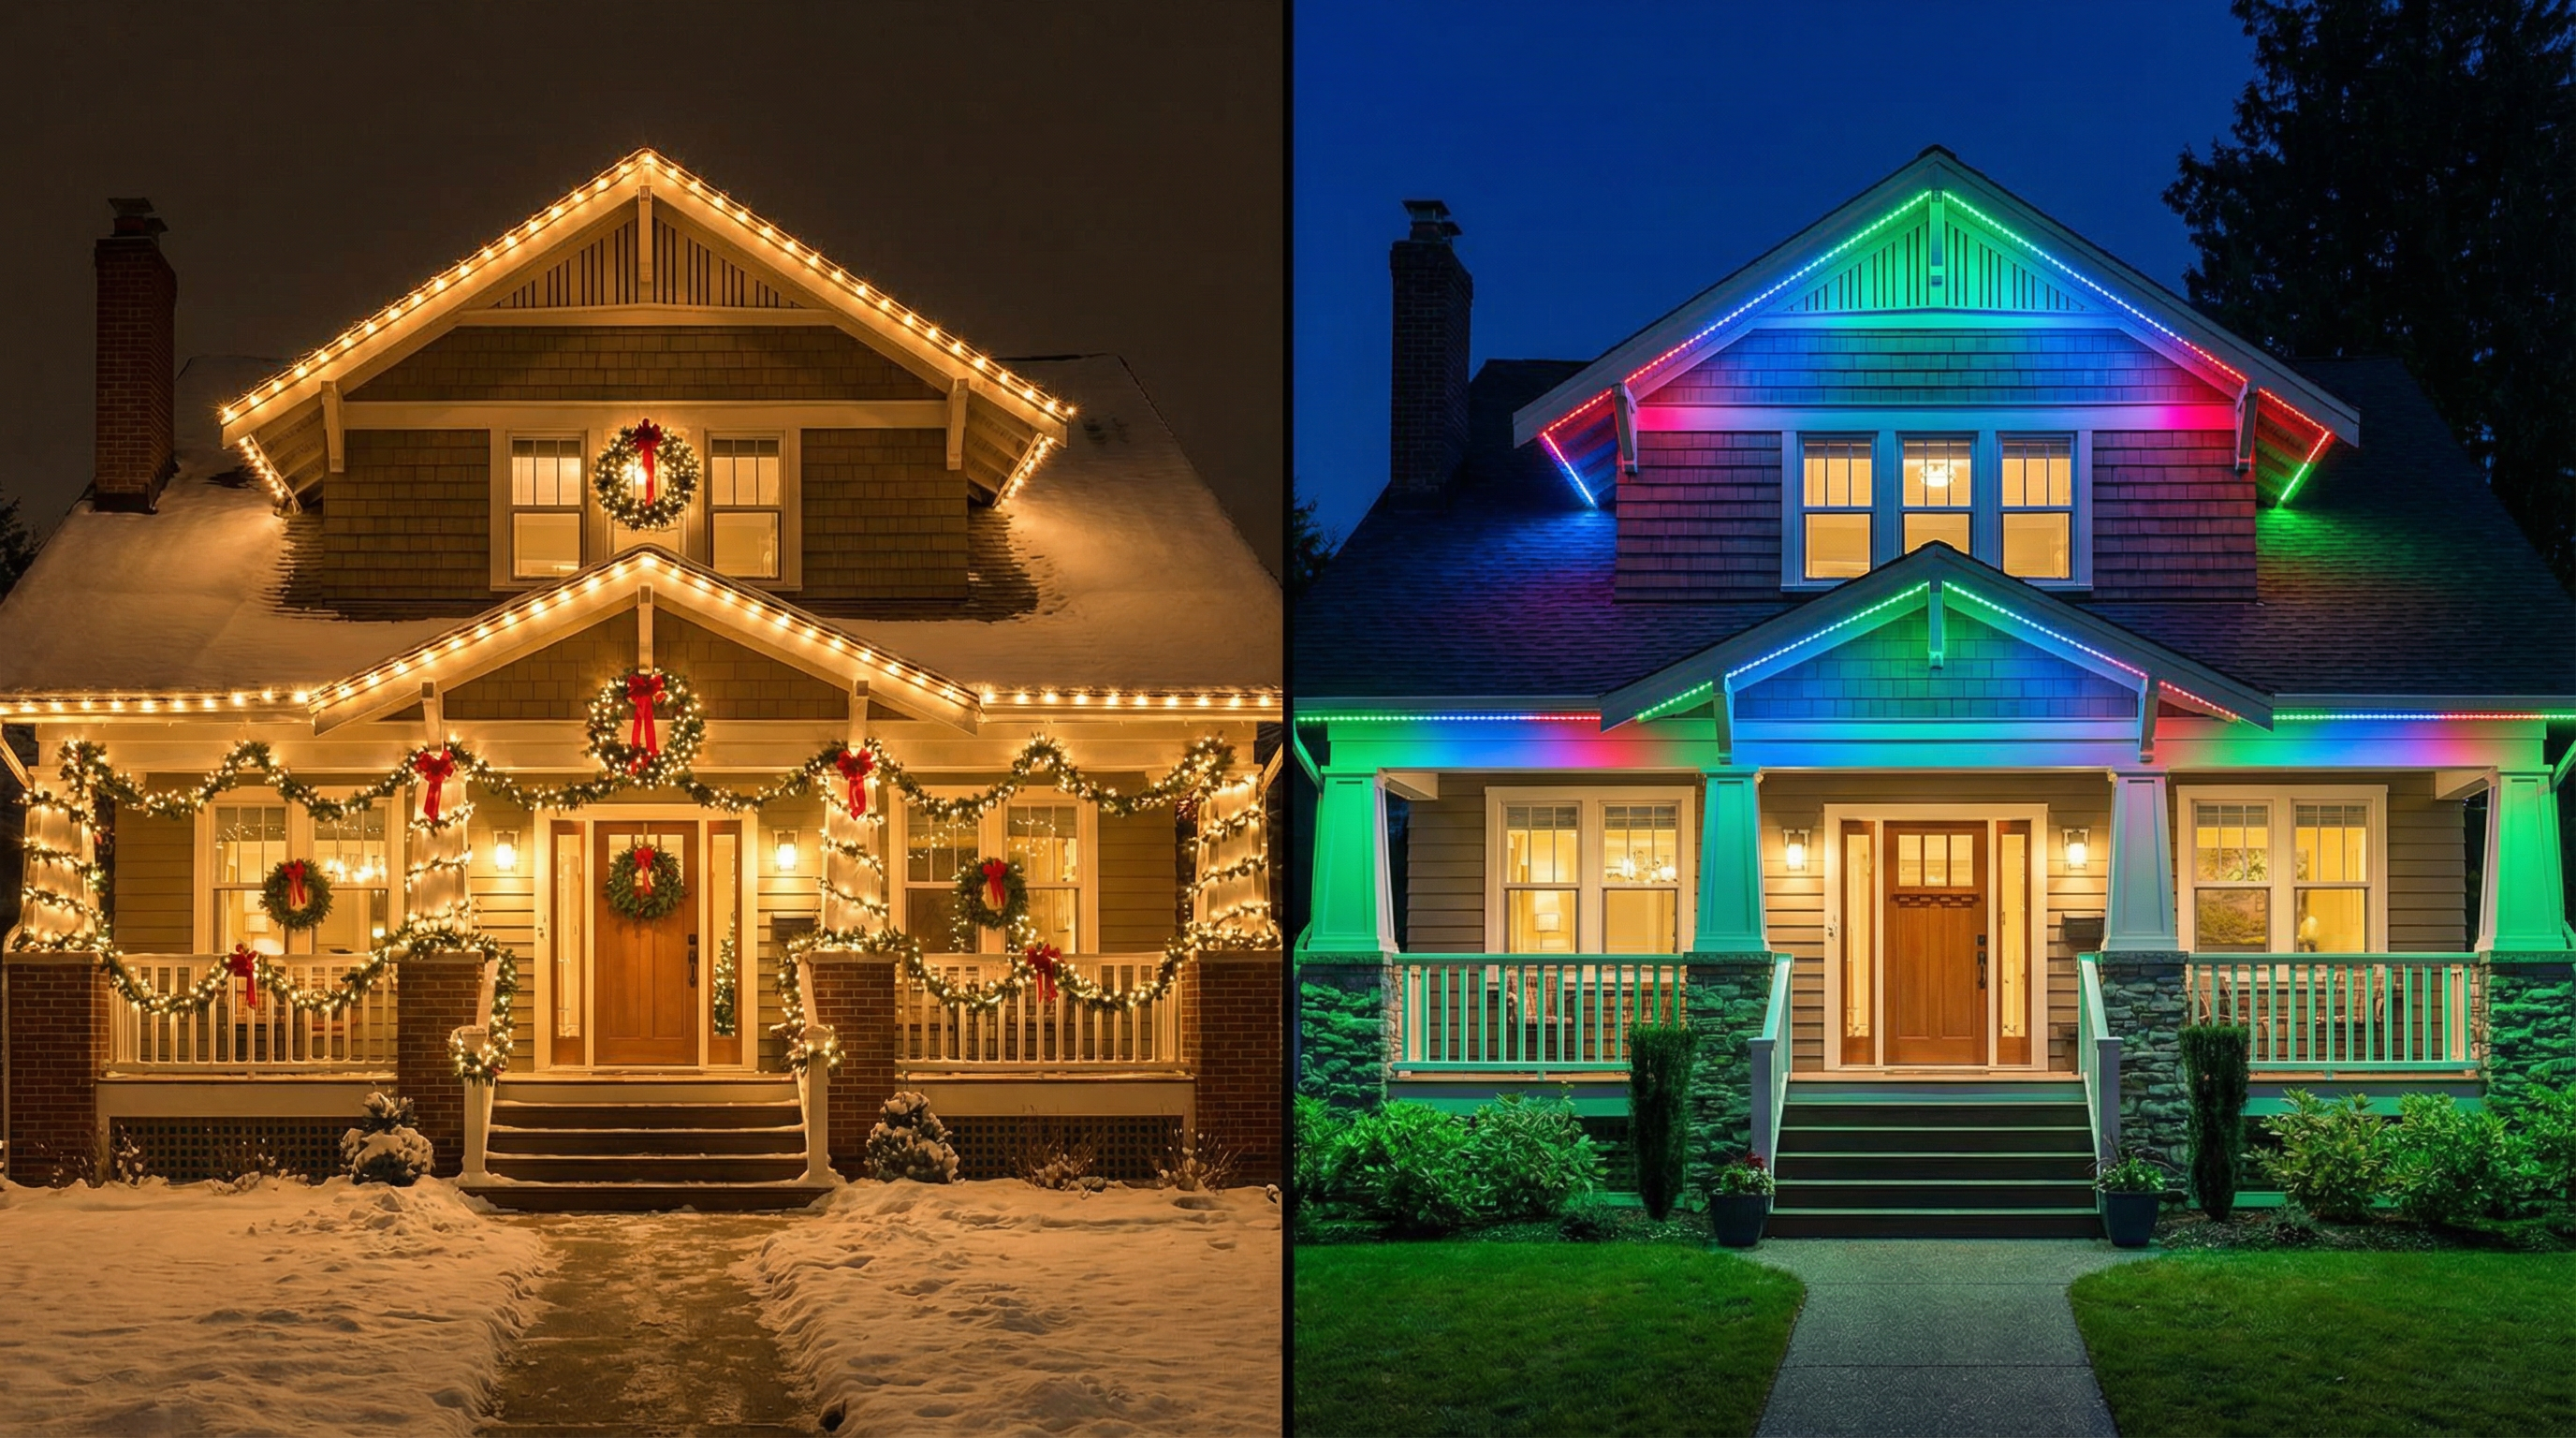
One of the most immediate and impactful decisions in any lighting design is the color palette. This choice goes beyond simple client preference; it's about wielding color theory and psychology to evoke a specific mood and enhance the architecture.
Color Temperature: The Foundation of Your Palette
Before even thinking about vibrant colors, you must master the nuances of white light. Color temperature is measured in Kelvin (K) and determines whether a white light appears warm (golden, yellowish) or cool (bluish). This single choice fundamentally dictates the atmosphere of your entire design.
- Warm White (2700K - 3000K): This is the classic, cozy glow most people associate with traditional Christmas lighting. It creates a welcoming, nostalgic, and intimate atmosphere. Warm white is exceptionally versatile and flatters most architectural materials, from red brick to warm-toned stone.
- Cool White (4000K - 5000K): Offering a crisp, modern, and energetic feel, cool white is often used to create a winter wonderland or icy aesthetic. It can make colors appear more vibrant and is excellent for highlighting sharp architectural lines on contemporary homes. However, be cautious, as it can feel stark or sterile on more traditional properties.
- Pure White or Neutral White (3500K): Sitting between warm and cool, neutral white provides a clean, balanced look without a strong yellow or blue cast. It's a safe and effective choice when you want a bright, clear display that doesn't lean too heavily in one atmospheric direction.
Here’s a quick reference for choosing the right color temperature:
| Color Temperature | Kelvin Range | Atmosphere | Best For |
|---|---|---|---|
| Warm White | 2700K - 3000K | Cozy, Traditional, Welcoming | Brick homes, traditional architecture, creating a classic holiday feel. |
| Neutral White | ~3500K | Clean, Bright, Balanced | Versatile for most applications, commercial properties, modern homes. |
| Cool White | 4000K - 5000K | Crisp, Modern, Icy | Contemporary architecture, creating a snowy or winter wonderland theme. |
Beyond White: Using Color Strategically
While white light is the workhorse, colored lights create accents and themes. The key is to use them with intention. A monochromatic scheme (e.g., all blue) can be incredibly elegant and modern. A complementary scheme (e.g., red and green) is classic for a reason, but the shades you choose matter. Avoid oversaturating a design with too many competing colors, which can look chaotic. Instead, consider a primary color with one or two accent colors to maintain a professional, cohesive look.
How Do You Space Christmas Lights Professionally?
Consistent spacing is the single most important factor for a clean, professional installation. Unevenly spaced lights immediately signal an amateur job. Mastering spacing rules for different applications will dramatically improve the quality of your work.
The Rules of Spacing
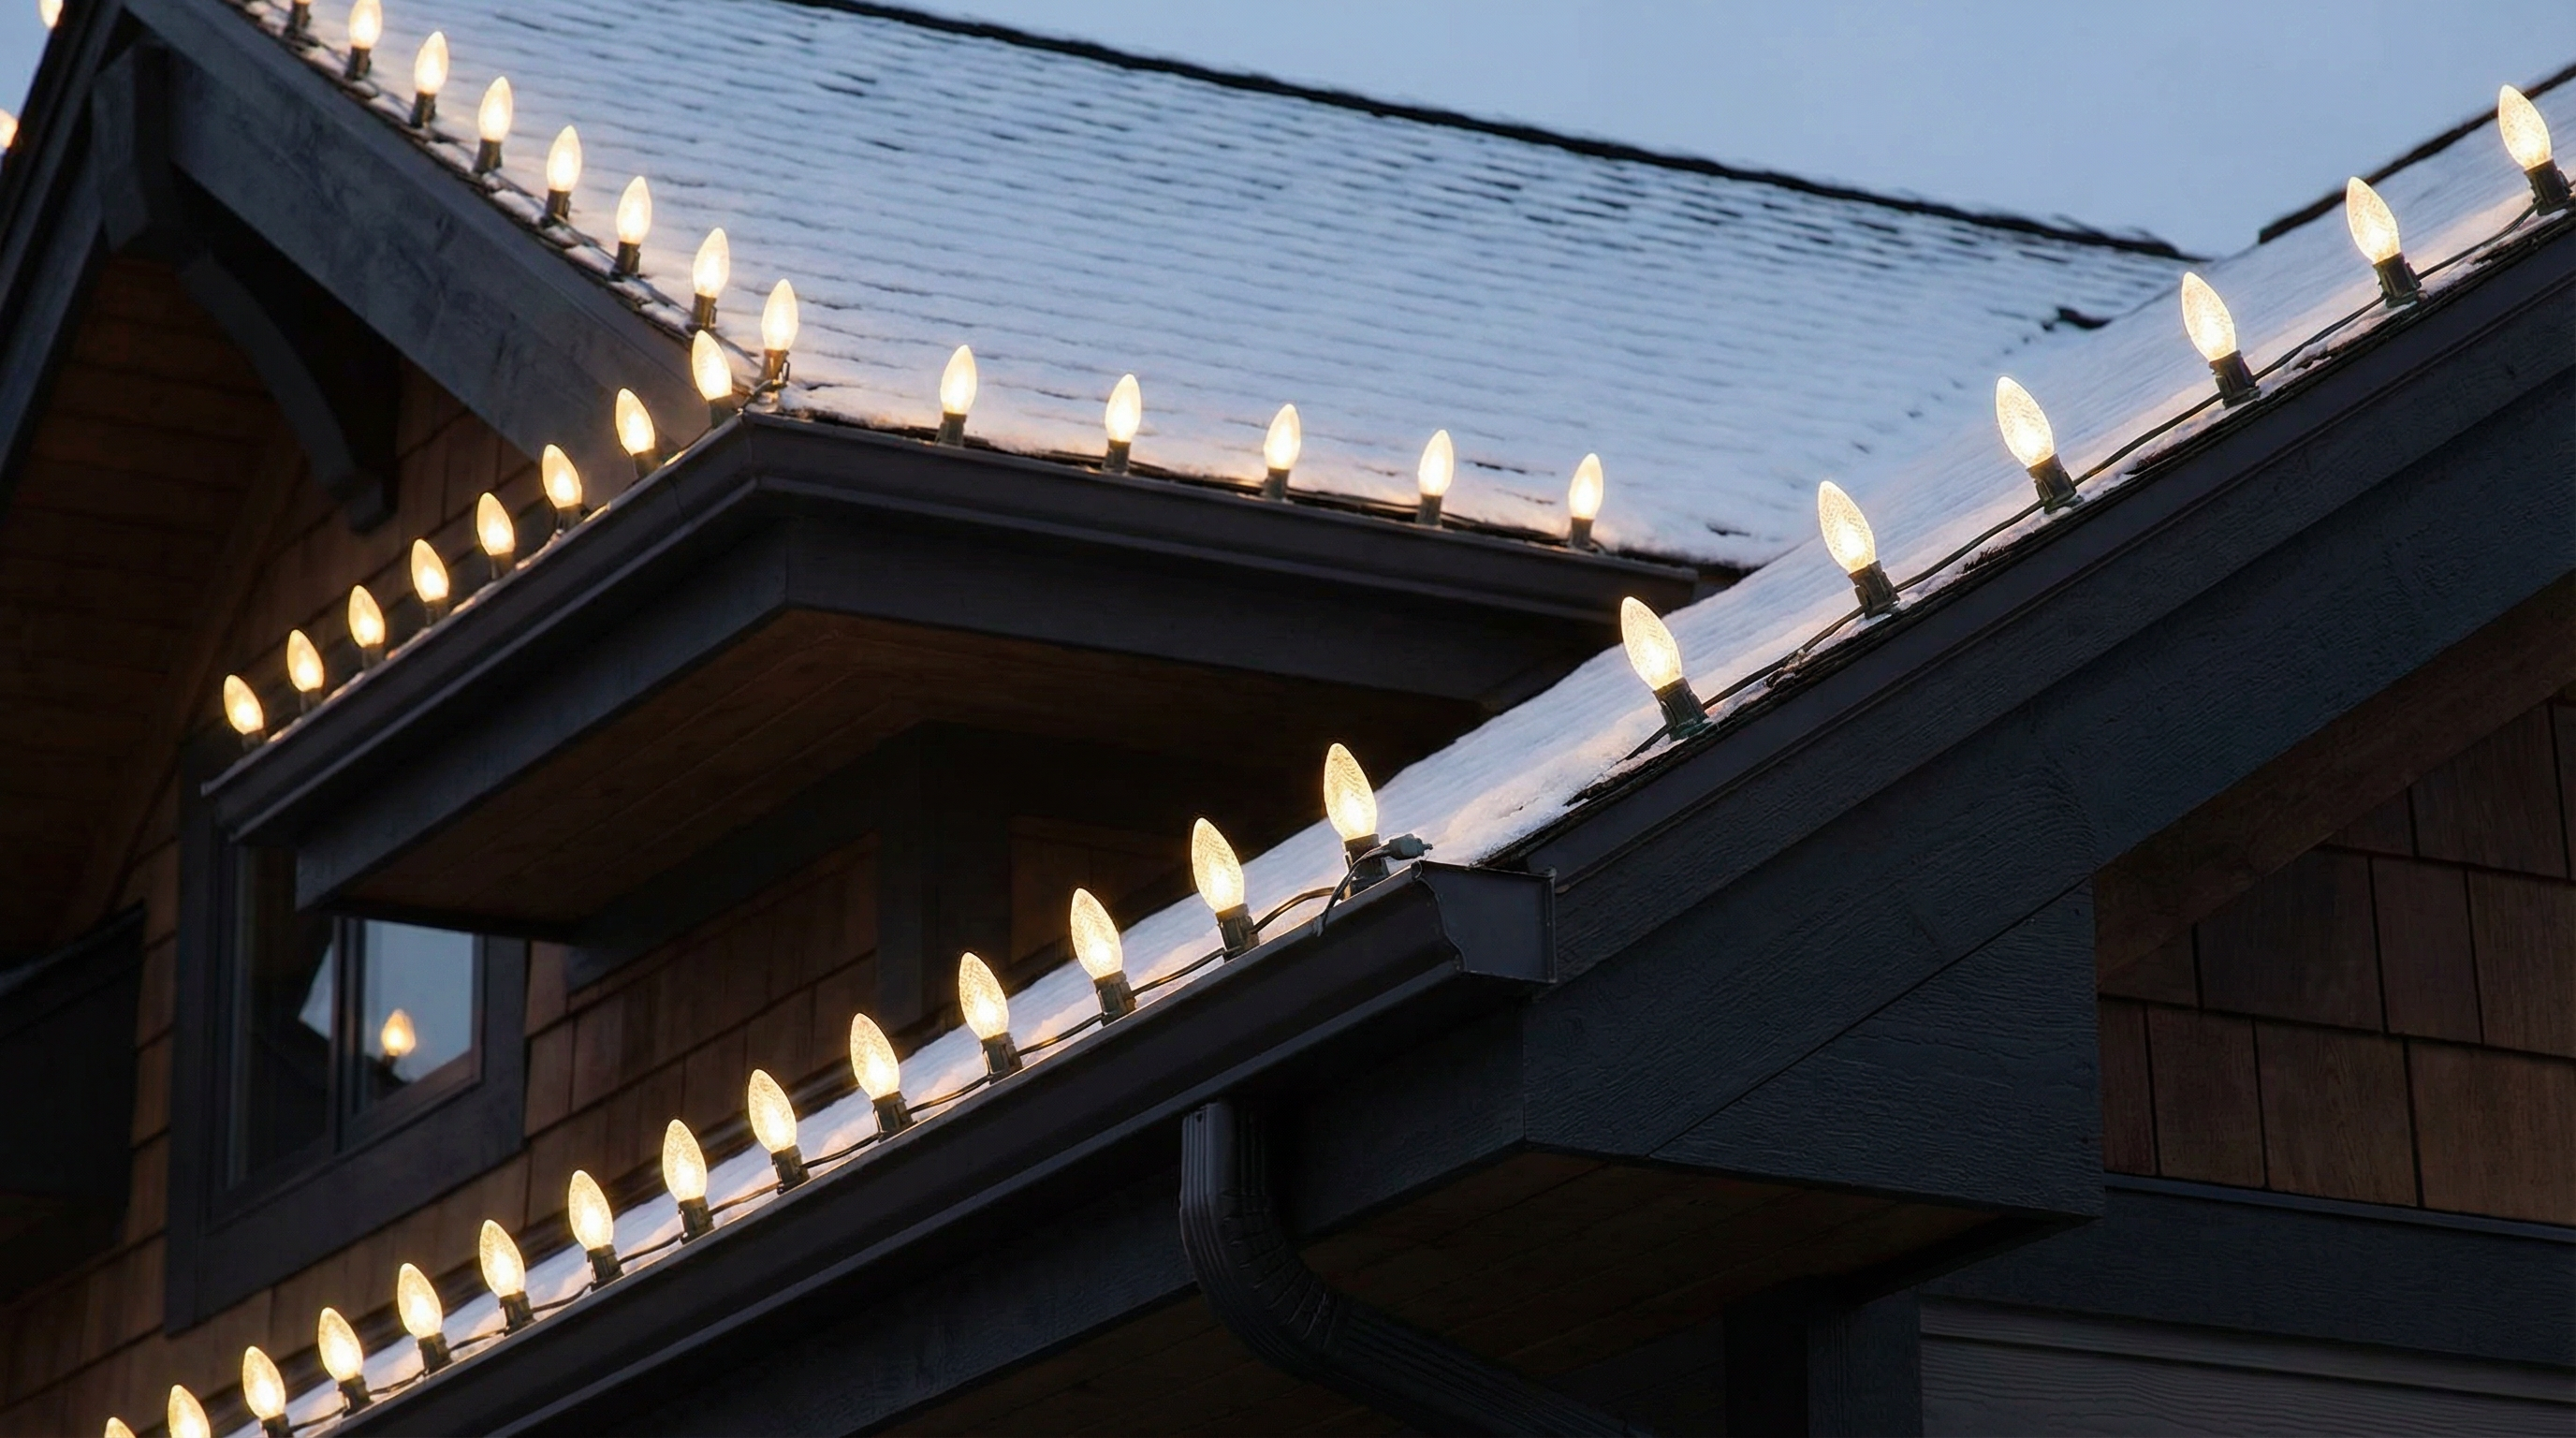
- Rooflines and Fascia Boards: This is where precision is most visible. The standard for C7 and C9 bulbs is typically 6 to 12 inches apart. 8-inch spacing is a popular and effective middle ground. The key is to be perfectly consistent. A measuring tape or a simple spacing tool (even a piece of wood cut to your desired length) is your best friend here. For mini lights, the spacing is much tighter, usually 4 to 6 inches.
- Windows and Doorways: Match the spacing you used on the roofline for a cohesive look. Use clips that hold the bulbs upright and straight. A perfectly outlined window is a mark of a true professional.
- Ridgelines: For ridgelines, especially on multi-story homes, using a slightly wider spacing of 12 inches can still look great while saving on product and installation time. The increased viewing distance makes the wider spacing less noticeable.
Roofline Lighting Techniques
Outlining the roof is the backbone of most holiday lighting designs. It defines the home’s architecture and creates the main structure of your display.
- Fascia Lighting: This involves attaching lights along the fascia board (the board that runs along the lower edge of the roof). This is the most common technique and provides a clean, linear look.
- Gutter Lighting: When attaching to gutters, use specialized gutter clips. Ensure the lights are facing outward and are all oriented in the same direction.
- Ridge Lighting: Lighting the peaks and ridges of the roof adds height and drama to a design. This requires specialized ridge clips and a strong focus on safety due to the heights involved. For complex roofs, lighting the ridges can be what takes a design from good to spectacular.
Pro Tip: When you present a design to a client, you can offer different packages. A basic package might just be the front fascia, while a premium package includes all fascia, ridges, and window outlines. This allows clients to choose a budget that works for them while seeing the potential of a full installation. For more strategies on presenting tiered options, check out our guide on pricing strategies for lighting contractors.
What is the Best Way to Light Trees and Bushes?
Landscape lighting adds depth and a crucial middle layer to your design, connecting the house to the rest of the property. Without it, even a beautifully lit home can feel like it's floating in a dark void.
Tree Wrapping Techniques
Wrapping trees is a labor-intensive but high-impact service that commands a premium price. There are two main approaches:
- Trunk and Major Branches: This is the most common and cost-effective method. Wrap the trunk from the base up to the main branches. Use a spacing of about 2-3 inches between wraps for mini lights. This technique highlights the tree's structure without requiring the time to wrap every small branch.
- Full Canopy Wrap: For deciduous trees, wrapping all the way to the tips of the branches creates a stunning, intricate display. This is a luxury service. The key is to maintain consistent spacing and ensure the lights are secure. For this, you'll want to use a much wider spacing as you move up the branches, often 6-12 inches, to avoid an overly dense look.
Bush and Shrub Netting
For bushes and shrubs, nothing beats the efficiency and uniform look of net lights. Simply draping a net over a bush provides even coverage in a fraction of the time it would take to wrap it with string lights. When quoting a job, always measure the dimensions of the bushes to ensure you're using the correct size net. For a more custom look, you can use mini lights to loosely weave through the foliage, which creates a more organic, less structured feel.
Creating Design Balance
A successful lighting design isn't just about the individual elements; it's about how they all work together. Balance is the principle of distributing visual weight across the property to create a sense of harmony and stability.
- Symmetrical Balance: This is achieved when both sides of the design are mirror images of each other. It's formal, traditional, and creates a sense of order. If a home’s architecture is symmetrical, leaning into that with your lighting design is often the best approach.
- Asymmetrical Balance: This occurs when the design has different elements on each side that have equal visual weight. For example, a large, brightly lit evergreen on one side of the property can be balanced by lighting the entryway and a group of smaller bushes on the other. Asymmetrical designs can feel more dynamic and modern.
The goal is to avoid a lopsided look. Step back from the property frequently during the design and installation process. View it from the street and from different angles. Does one side feel heavier or more cluttered than the other? If so, you may need to add, remove, or reposition elements to restore balance.
Speaking of design, creating a visual mockup is the most powerful sales tool in a lighting contractor's arsenal. Showing a client exactly what their home will look like removes guesswork and gets them excited about the project. Tools like IgnitelyAI's mockup generator allow you to create stunning, realistic lighting designs in minutes, helping you close more deals and bigger projects. You can upload a photo of the client's property and apply different lighting styles, colors, and techniques directly on the image. It's a game-changer for professional presentations. Find out more on our main page.
Frequently Asked Questions
How many colors should I use in a Christmas light display?
For a professional and cohesive look, it's best to stick to a limited color palette. A good rule of thumb is to use one primary color and one or two accent colors at most. Monochromatic schemes (all one color) or analogous schemes (colors next to each other on the color wheel) are also very effective.
What's the most common mistake in holiday lighting design?
The most common mistake is inconsistent spacing. Even the highest quality lights will look amateurish if the spacing is uneven. Use a measuring tool and take your time to ensure every bulb is perfectly placed, especially on highly visible areas like rooflines.
How do I create a focal point in my lighting design?
A focal point draws the viewer's eye to a specific area. You can create one by using brighter lights, a unique color, or more complex lighting in one part of the design, such as a large wreath on the front of the house, a fully wrapped statement tree, or an illuminated archway over the entrance.
Should I use LED or incandescent lights?
For professional contractors, LED is the only way to go. They are up to 90% more energy-efficient, far more durable, and have a much longer lifespan. The color quality and variety of modern LEDs are outstanding. While they have a higher upfront cost, the long-term benefits for both you and your client are undeniable.
How do I balance a design on a non-symmetrical house?
For asymmetrical homes, aim for asymmetrical balance. This means balancing the visual weight of the design. For example, if there is a large garage on the left side, you could balance it by lighting a prominent tree and the front entryway on the right side. The goal is to make the overall composition feel stable, not to mirror each side.
Ready to Transform Your Lighting Business?
Join thousands of lighting contractors using IgnitelyAI to create stunning mockups, close more deals, and grow their business.
Start Your Free Trial